Widget installation means adding the embed code issued in the console to your website. WordPress, static pages and custom-built sites all use the same method, and all you need is the ability to add one line of HTML. Cafe24 stores and Shopify stores get the script added automatically when the app is installed, so they are not covered by this document.
A first installation takes about 10 minutes. For product cards and knowledge collection to work properly, your site has to meet certain conditions, which are listed in Preparing your site.
Before you start
- Admin account and membership: only the admin can issue the widget key and view the embed code
- Site casting complete: the casting step in Sign-up and initial setup
- Permission to edit site code: you must be able to add a
<script>tag to the shared layout or footer - Known production deploy method: you must be able to check the change on the real domain after deploying the code
Widget key and embed code
Sign in with the admin account and open "Connect agent" (/casting) in the sidebar. If you have a saved casting result, click "Connect this address" in the "Next up" card and then "Connect" in the confirmation, and everything needed for installation is prepared at once. If you have no saved result, cast first on the public casting page with "Cast your site".
Connecting goes through three steps in order.
- Widget key issuance: creates a key for the domain of the address you cast. If a key has already been issued, that key is used as is.
- Site analysis: reads the pages again to identify the industry and the content the site covers. This uses 1 of your 10 daily analyses.
- Persona application: applies a persona matching the analysis result to the agent.
Even if analysis fails, the key is issued normally, so you can continue with installation.
When connecting finishes, the code appears in "Install guide" on the same screen. Choose the tab that matches your site, "Script tag" or "React · Next.js", and the code with your key filled in appears. You can copy the same code again from "Embed code" in "Widget settings" (/widget) in the sidebar.
The key value is shown only to the admin. If a developer handles installation, the admin copies the code and passes it on. The relationship between keys and domains is explained in Widget key and domains.
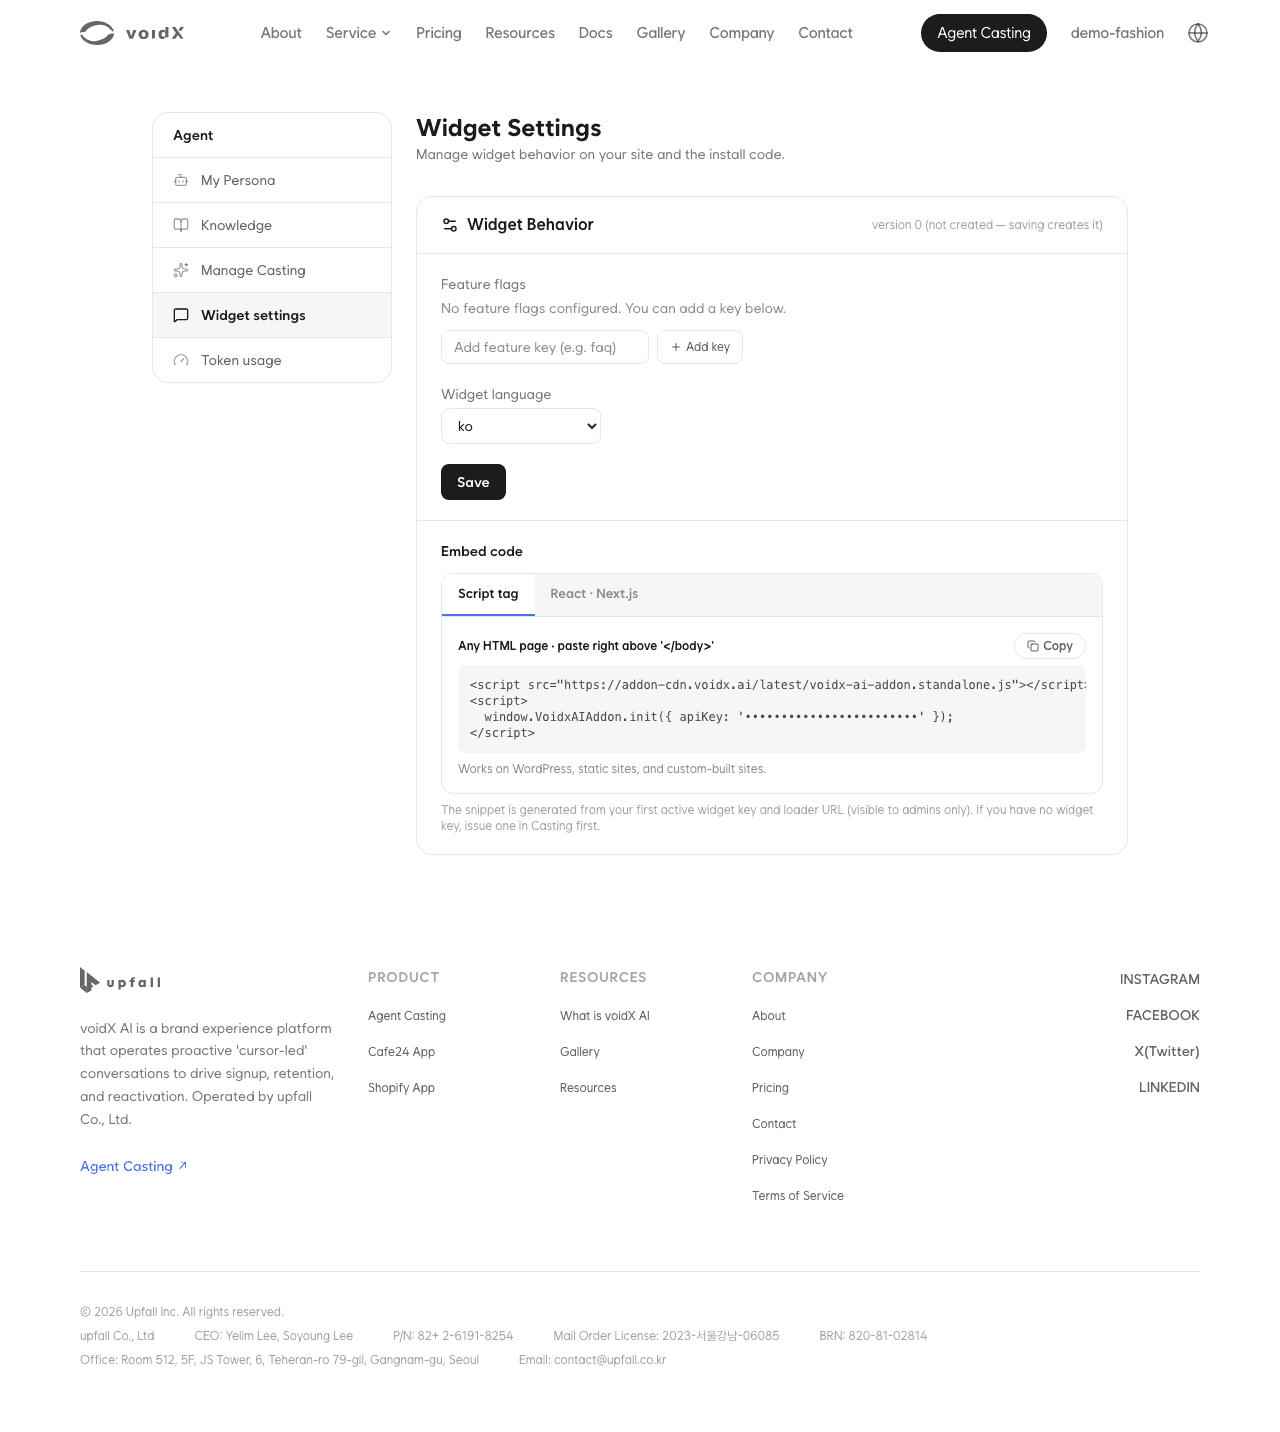
Adding the script tag
Copy the code from the "Script tag" tab and paste it just above </body> on your site. On WordPress this is the theme's footer area, and on a static site it is the shared layout file.
<script src="https://addon-cdn.voidx.ai/latest/voidx-ai-addon.standalone.js"></script>
<script>
  window.VoidxAIAddon.init({ apiKey: 'YOUR_API_KEY' });
</script>
The value that goes in place of YOUR_API_KEY is the widget key. Code copied from the screen already has the real value filled in.
Placing it inside <head> does not work. It runs before the document body the widget draws into exists.
For sites built with React or Next.js, use the component method below instead of this step.
Adding the React · Next.js component
This method adds the widget as a component instead of a script tag. First install the package.
npm install @voidx-ai/react
Put the key in an environment variable instead of writing it directly in the source. With this method the key is included in the bundle sent to the browser, so writing it in the source leaves it in your repository.
NEXT_PUBLIC_VOIDX_API_KEY=YOUR_API_KEY
Place the component in the root layout.
import { VoidxAddon } from '@voidx-ai/react';

export default function RootLayout({
  children,
}: {
  children: React.ReactNode;
}) {
  return (
    <html>
      <body>
        <VoidxAddon apiKey={process.env.NEXT_PUBLIC_VOIDX_API_KEY!} />
        {children}
      </body>
    </html>
  );
}
The component loads the script only once and cleans up the widget when it unmounts. Detailed options such as changing the language or turning off features are in the SDK reference.
Pinning the version on a production site
The /latest/ in the code above is an address that changes whenever a new version is released. It suits demos and testing, but on a live site its behavior can change without notice.
| Address | Nature | Use |
|---|---|---|
/latest/ | Updated with every release | Demos, testing |
/v{version}/ | Immutable once published | Production sites |
On a production site, pinning the version and upgrading only after checking the new version is recommended.
<script src="https://addon-cdn.voidx.ai/v{version}/voidx-ai-addon.standalone.js"></script>
If you use the React component, pass the same address to the scriptUrl prop.
Setup check
Open a page with the code deployed in your browser.
| Item | How to check |
|---|---|
| Widget display | Check that the character appears in a corner of the screen and that the first greeting bubble appears above it within 3 to 7 seconds |
| Chat | Click the character to open the chat window, send a question and check that an answer comes back |
| Product cards | On a product detail page, ask about that product and check that a product card appears below the answer. If no card appears, the site markup is usually not recognized as a product. Check the product recognition section of Preparing your site |
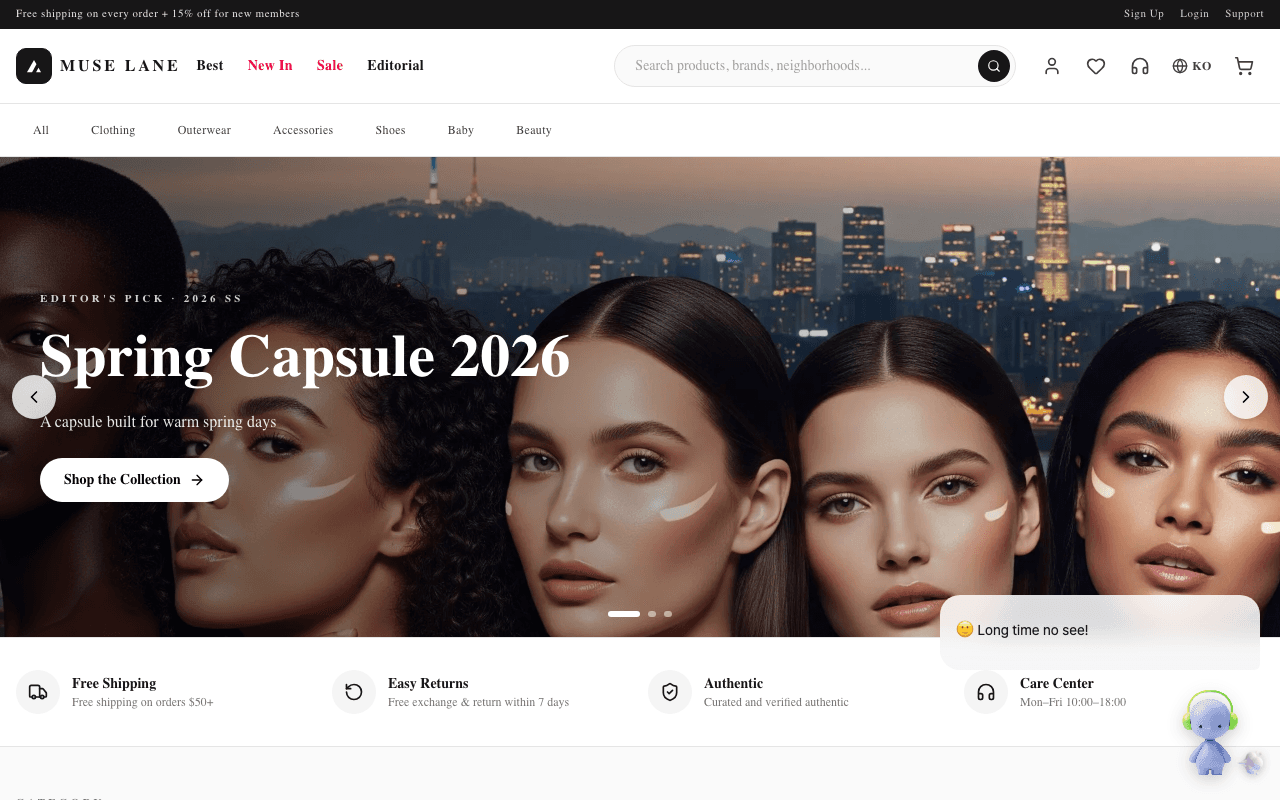
When the widget does not show, there are three common causes.
| What to check | Common mistake |
|---|---|
| Address you opened | The widget key works only on the domain it was issued for. Opening the site on localhost or another domain |
| Code location | Placing the code inside <head> instead of just above </body> |
| Key value | The old key is still on the site after the key was reissued |
If none of the three applies, go through the fixes in Widget not showing in order.
Next steps
- For initialization options, runtime API and events, see SDK reference.
- For widget features, language settings and reissuing the embed code, see Widget settings.
- For the screen elements and behavior visitors see, see Chat screen.