Opening "Widget settings" (/widget) in the sidebar shows the widget's behavior settings and the install code for your site. Which features to turn on and which language the widget speaks are changed here, without editing your site's code.
The screen requires a membership. Saving settings requires Editor or above, and viewing keys is admin only.
Widget keys are issued and regenerated not on this screen but under the collapsed "Manage widget keys directly" section of "Connect agent" (/casting).
Screen layout
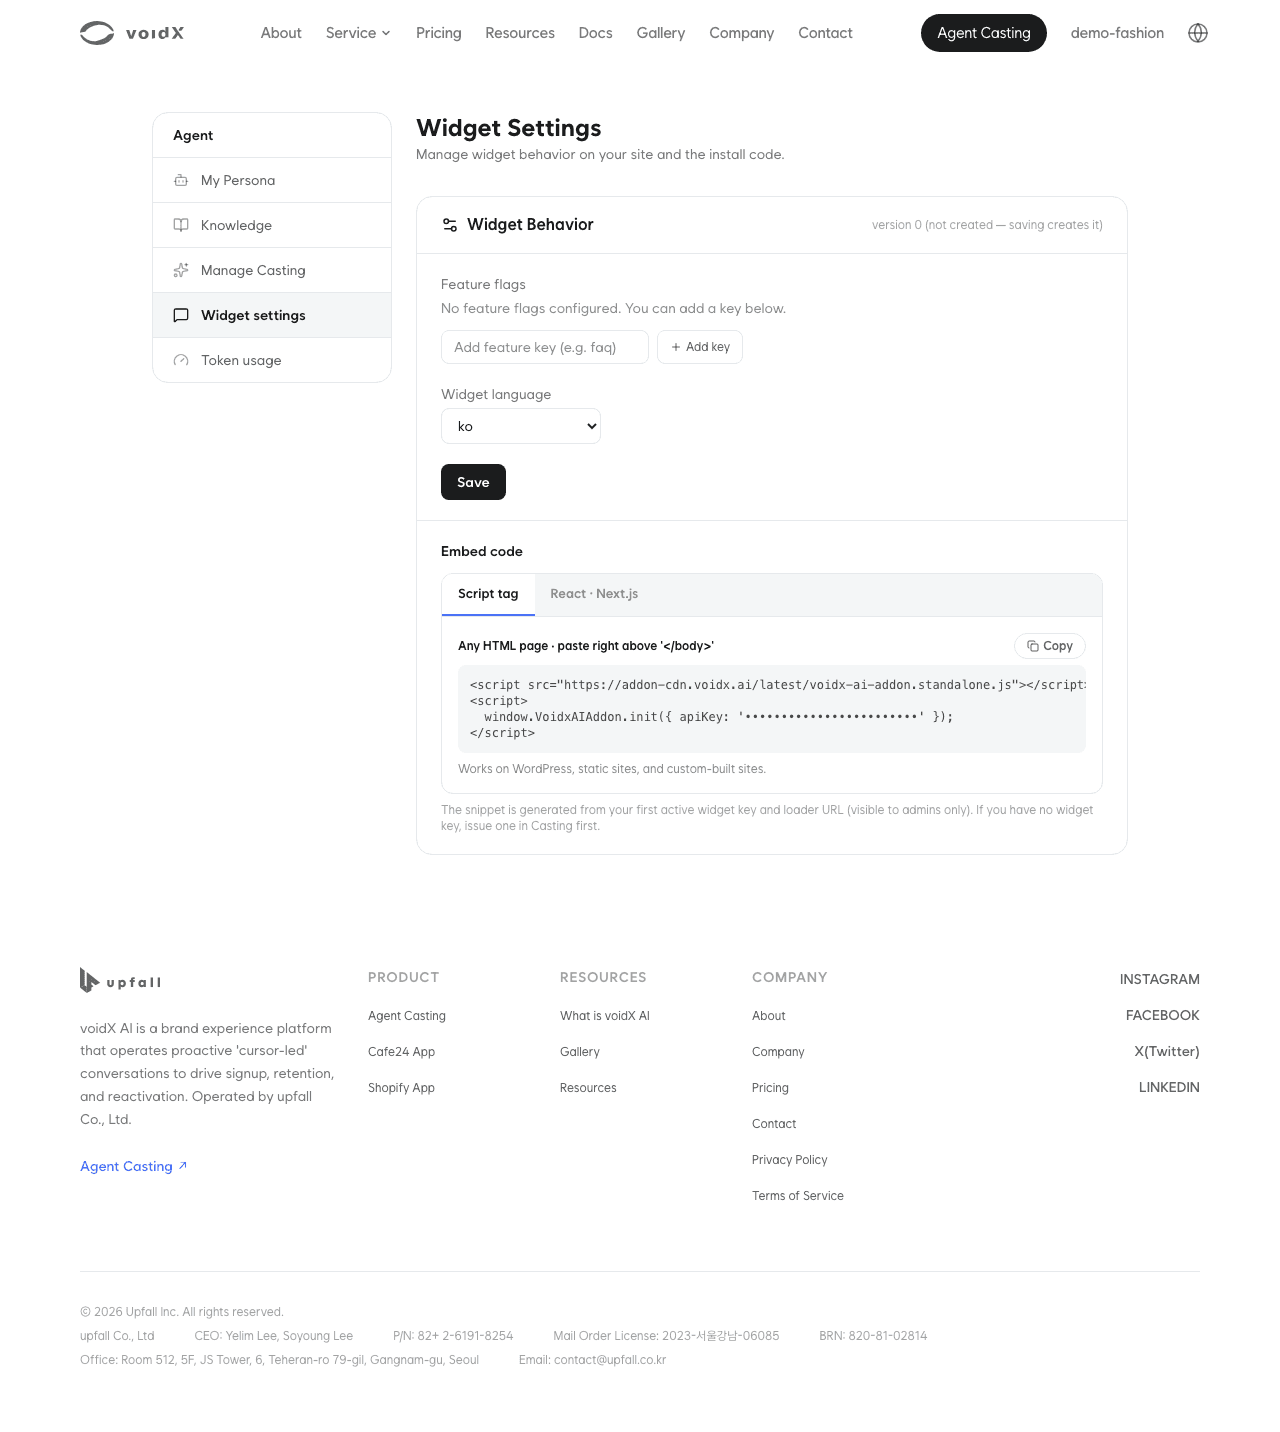
From top to bottom, the screen has two areas.
- Widget Behavior: where you change feature flags and the widget language
- Embed code: where you copy the install code for your site
Widget behavior
"version {version}" at the top right of the card is the version of the saved settings. If the settings have never been saved, a note says they will be created on the first save.
| Item | What it changes |
|---|---|
| "Feature flags" | Whether widget features are on or off. If the list is empty, enter a key in "Add feature key (e.g. faq)" and click "Add key" |
| "Widget language" | One of ko · en · ja · zh |
Clicking "Save" shows "Saved (version {version}). The widget picks this up on its next call." Visitor pages that are already open receive the new settings after a refresh.
If someone else changed the same settings first, saving is blocked and "Settings were changed in another session. Reload the latest settings and save again." is shown. Click "Reload latest" and make your edits again. This keeps two people's changes from overwriting each other.
When a Viewer account saves, "You do not have permission to change settings (Editor or above)." is shown.
Embed code
The "Embed code" area holds the install code for your site. It is built from the first active widget key, and the key value is filled in only for admin accounts. If there is no widget key, a footnote says to "connect your agent in Connect agent first".
| Tab | For |
|---|---|
| "Script tag" | Sites where you can add HTML directly. Paste right above </body> |
| "React · Next.js" | Three blocks: install the package, add the key to your env, place the component in the root layout |
Take the code with each block's "Copy". As the React tab notes, the key ships in the client bundle, so keep it in an environment variable rather than in source.
Manage widget keys directly
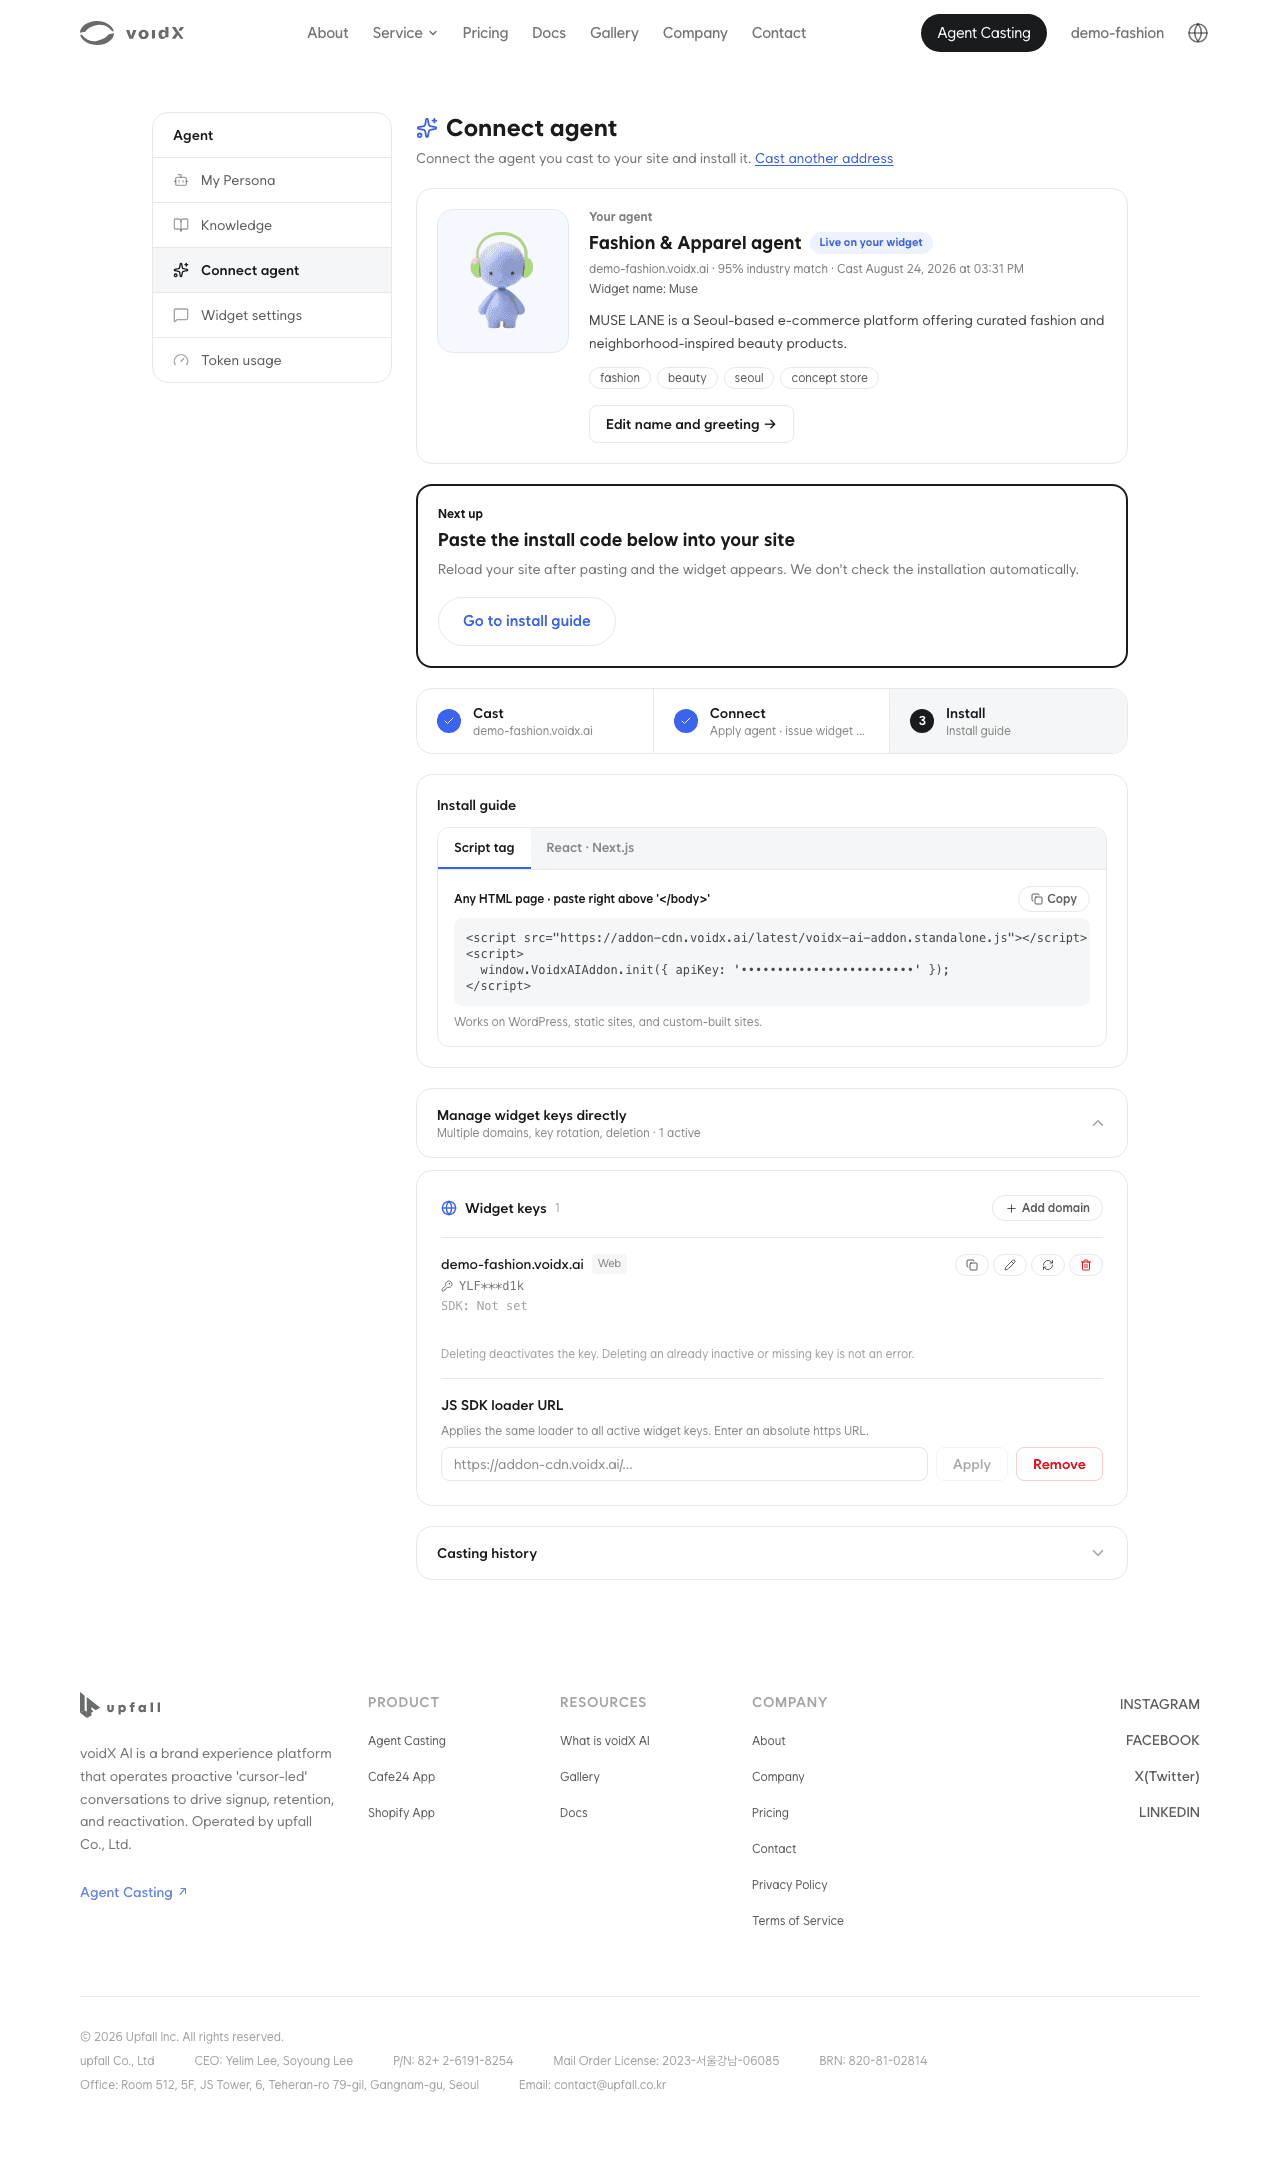
You come back to widget keys when the person in charge changes or you open another site. Expanding "Manage widget keys directly" at the bottom of the "Connect agent" screen shows the "Widget keys" list. As its subtitle says, "Multiple domains, key rotation, deletion" are handled here.
| Action | How |
|---|---|
| Issue | In "Add domain", choose a domain (for example shop.example.com) and type ("Web" · "Cafe24" · "App"), then click "Issue" |
| View and copy key | Keys are visible and "Copy key" is available only on admin accounts. Other roles see "The key is visible to admins only" |
| Regenerate | "Regenerate key". The new key is shown in full only once and the previous key becomes invalid immediately |
| Delete | Trash button, then "Confirm delete". The token becomes inactive |
| Set loader URL | Enter an https address in "JS SDK loader URL" and click "Apply". Applies to all active tokens |
You can issue multiple keys for the same domain, and each issue creates a unique key. Use this to separate test and production keys.
Next steps
- For how keys are tied to domains, see Widget key and domains.
- For adding the copied code to your site, see Widget installation.
- If the widget does not appear on your site, see Widget not showing.